How a Koi Pond Is Built: A Step-by-Step Construction Guide
Sep 1st 2026

Sep 1st 2026
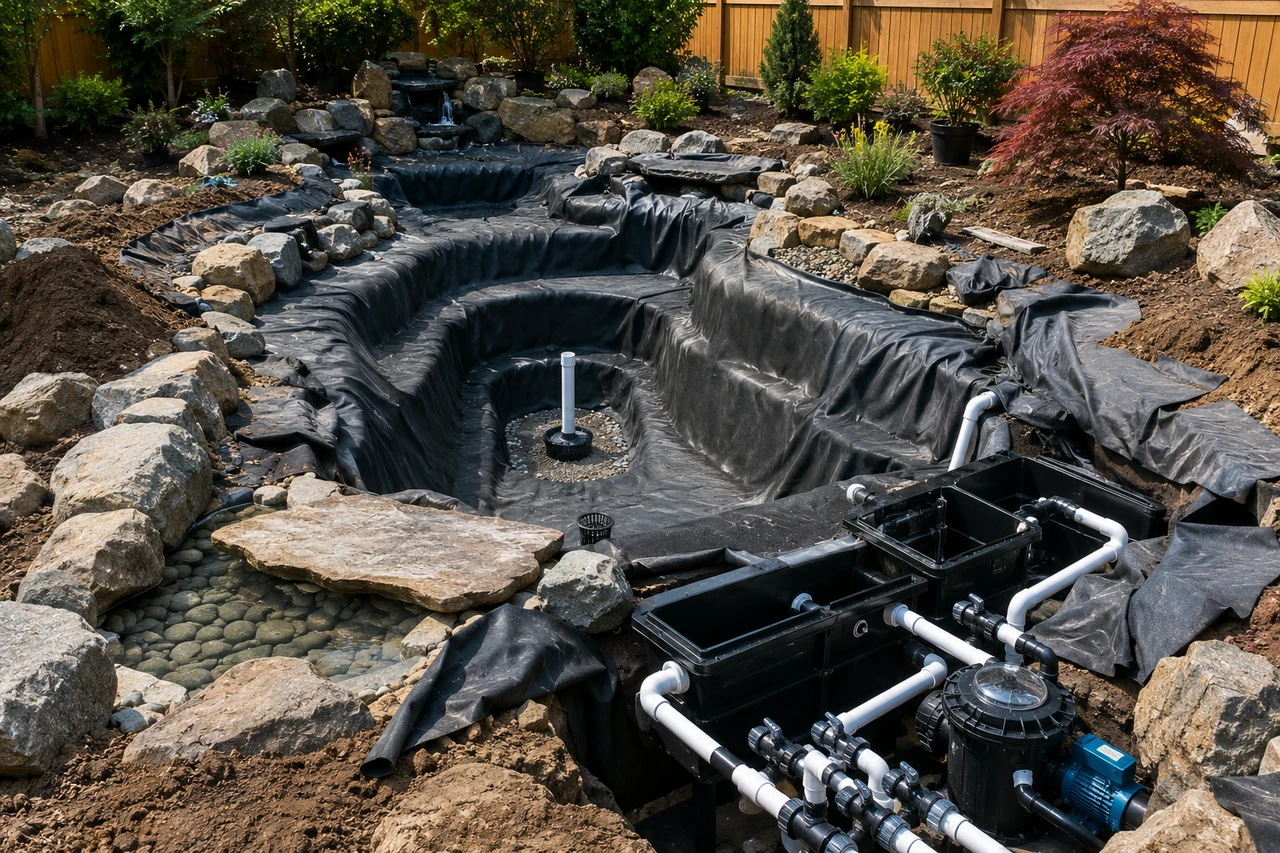
Understanding how a koi pond is built starts with recognizing that it isn’t just a decorative water feature with fish added later. A proper koi pond is planned as a complete aquatic system, with depth, drainage, filtration, circulation, aeration, and fish load all working together. The construction sequence usually begins with site selection and design, followed by excavation, plumbing, liner or concrete installation, filtration, finishing, filling, cycling, and finally introducing koi.
Those early design decisions have a long reach. A poorly placed bottom drain, inadequate depth, undersized filtration, or weak circulation can create problems that are expensive to correct once the pond is complete. A thoughtful build addresses those issues before soil is removed and equipment is purchased.
Koi also place different demands on a pond than plants or small ornamental fish. They can grow large, produce significant waste, and depend on stable water quality and sufficient oxygen. That’s why a dedicated koi pond is designed around the needs of the fish from the beginning rather than treating filtration and aeration as afterthoughts.
A beautiful koi pond should do more than look good. Fitz’s Fish Ponds designs and builds custom ponds around the complete system, including pond size, depth, excavation, filtration, circulation, aeration, rockwork, waterfalls, and the needs of the fish that will live there.
Our construction team works with homeowners from the initial consultation and design through site preparation, installation, ecosystem setup, and the final walkthrough, with experience building everything from above ground ponds, dedicated koi ponds and water gardens to formal ponds, large natural ponds, and custom water features.
If you’re planning a new pond and want the design and equipment working together from the start, talk with Fitz’s Fish Ponds about your project. Talk to an Expert Online or call us at (908) 420-9908.
Most koi pond projects follow a fairly consistent sequence, even though the final shape, equipment, materials, and landscaping can vary considerably. Looking at the full process first makes it easier to see how each part connects with the next.
A typical construction sequence looks like this:
The first few stages often determine how well the finished pond performs. Depth and drainage are especially difficult to change after the liner or concrete shell is installed. Plumbing routes also need to be considered early because pipes must reach pumps, filters, skimmers, drains, and return points without creating unnecessary restrictions.
The goal throughout construction is to create a pond that moves water efficiently, manages waste, maintains adequate oxygen levels, and provides koi with enough room to mature.
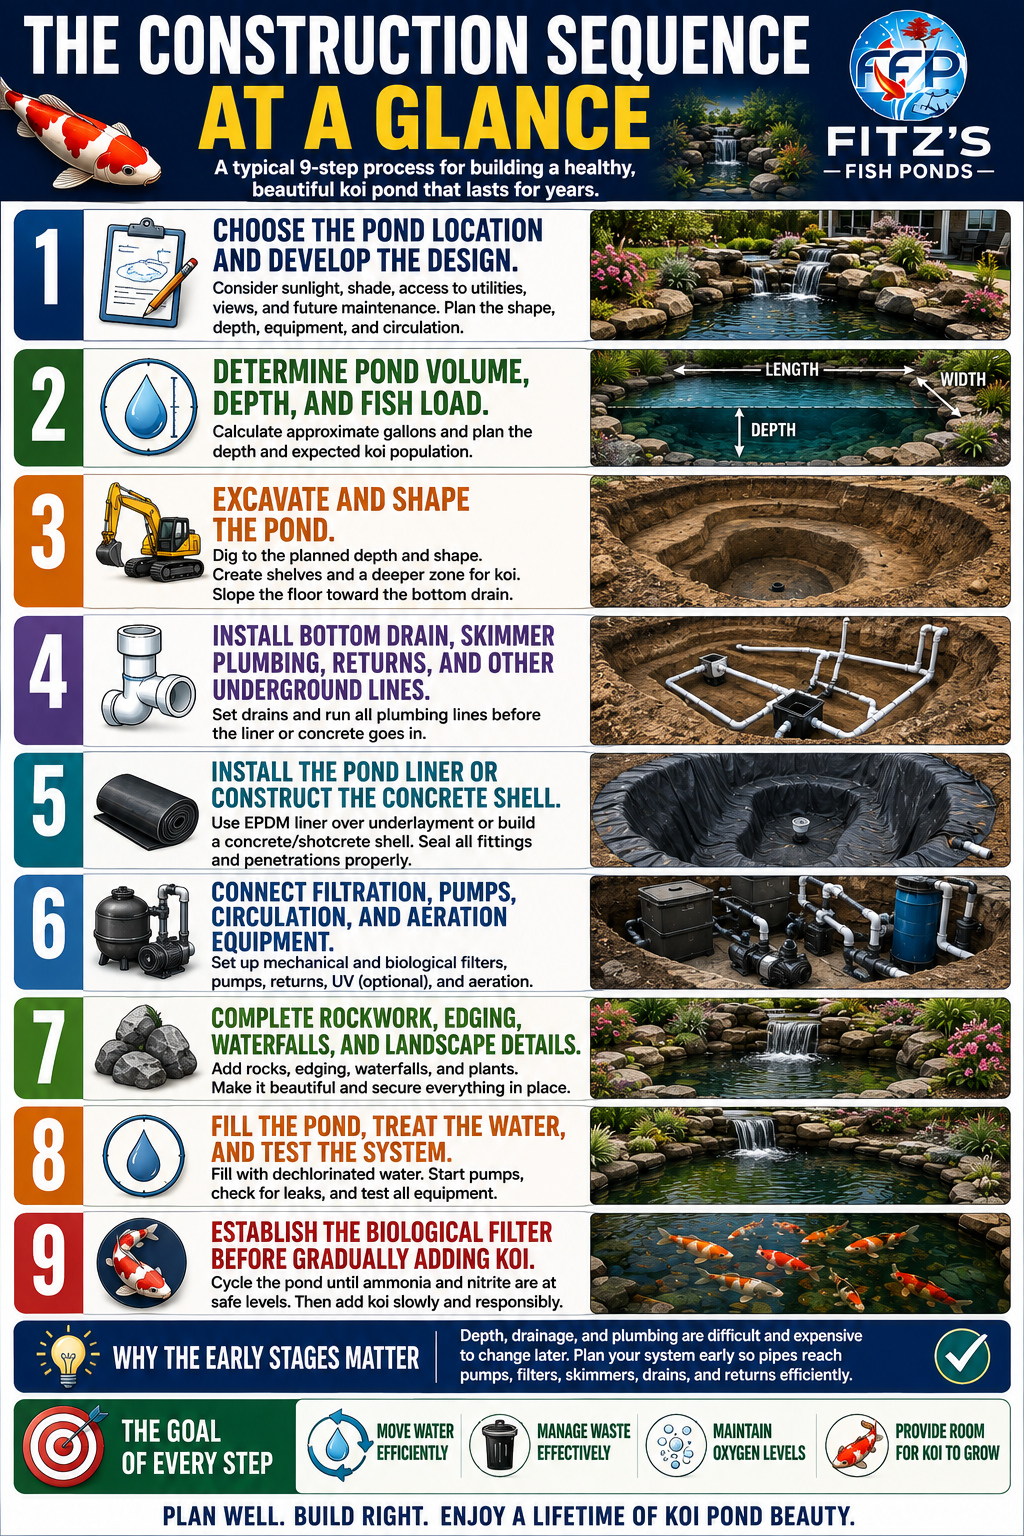
A successful koi pond starts on paper rather than in the ground. The location affects sunlight, temperature, debris, maintenance access, utility requirements, landscaping, and the overall experience of viewing the pond. Choosing a site carefully can reduce future maintenance while making the finished feature feel like a natural part of the property.
Some sunlight can be beneficial, but full sun throughout the entire day can make summer water temperatures more demanding. Heavy tree cover presents a different challenge because falling leaves and organic debris can quickly increase the workload placed on the skimmer and filtration system. Runoff from lawns, planting beds, and surrounding hardscape should also be considered before settling on the final location.
Access is equally important. Pumps, filters, aerators, UV equipment, and other components require electricity, while routine maintenance is easier when there’s a practical water source nearby. Service access should be planned so that equipment can be inspected, cleaned, repaired, or replaced without dismantling the surrounding landscape.
Depth is one of the major design decisions. Many koi ponds have a minimum depth of 3 feet, with deeper ponds sometimes used in colder climates or larger systems. Greater depth can increase water volume, improve temperature stability, and give koi more space from surface predators. An easy way to calculate the approximate number of gallons in a pond would be to multiply the length, width, and depth by 7.5 (example: L x W x D x 7.5). You will want 250 gallons per mature koi. This helps you figure out the design of your pond based on the number of koi you’d like to add.
Before excavation begins, the plan should account for:
Utility locations should also be confirmed before digging. Local rules may apply to water depth, barriers, fencing, setbacks, or permits, so checking requirements before construction can prevent major complications later.
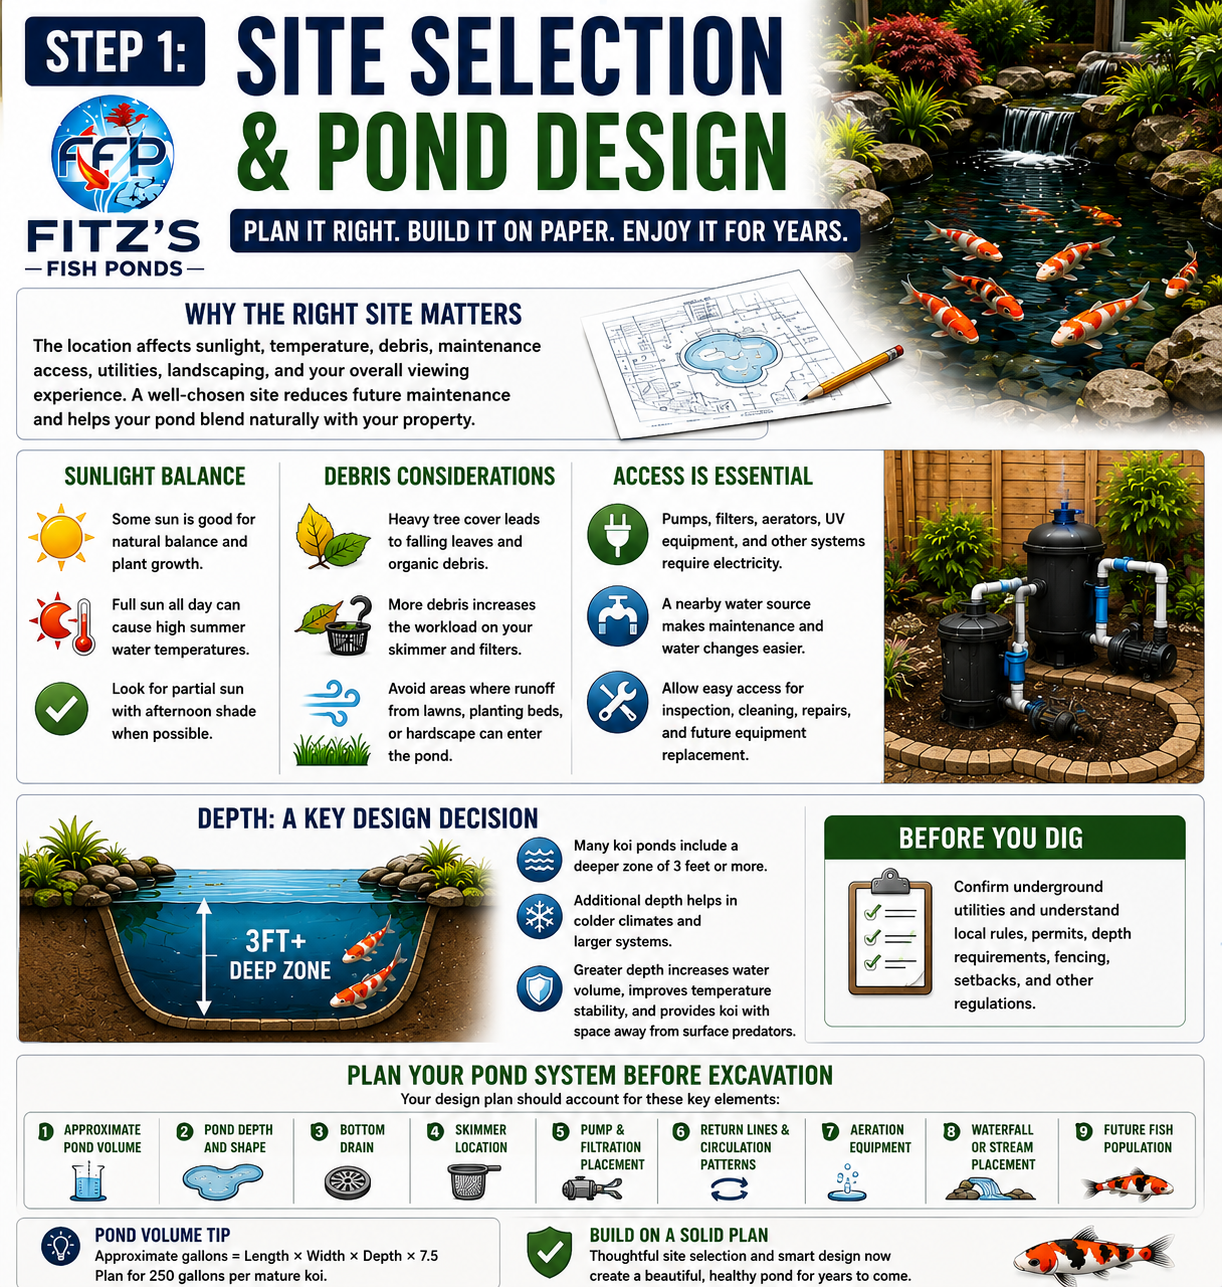
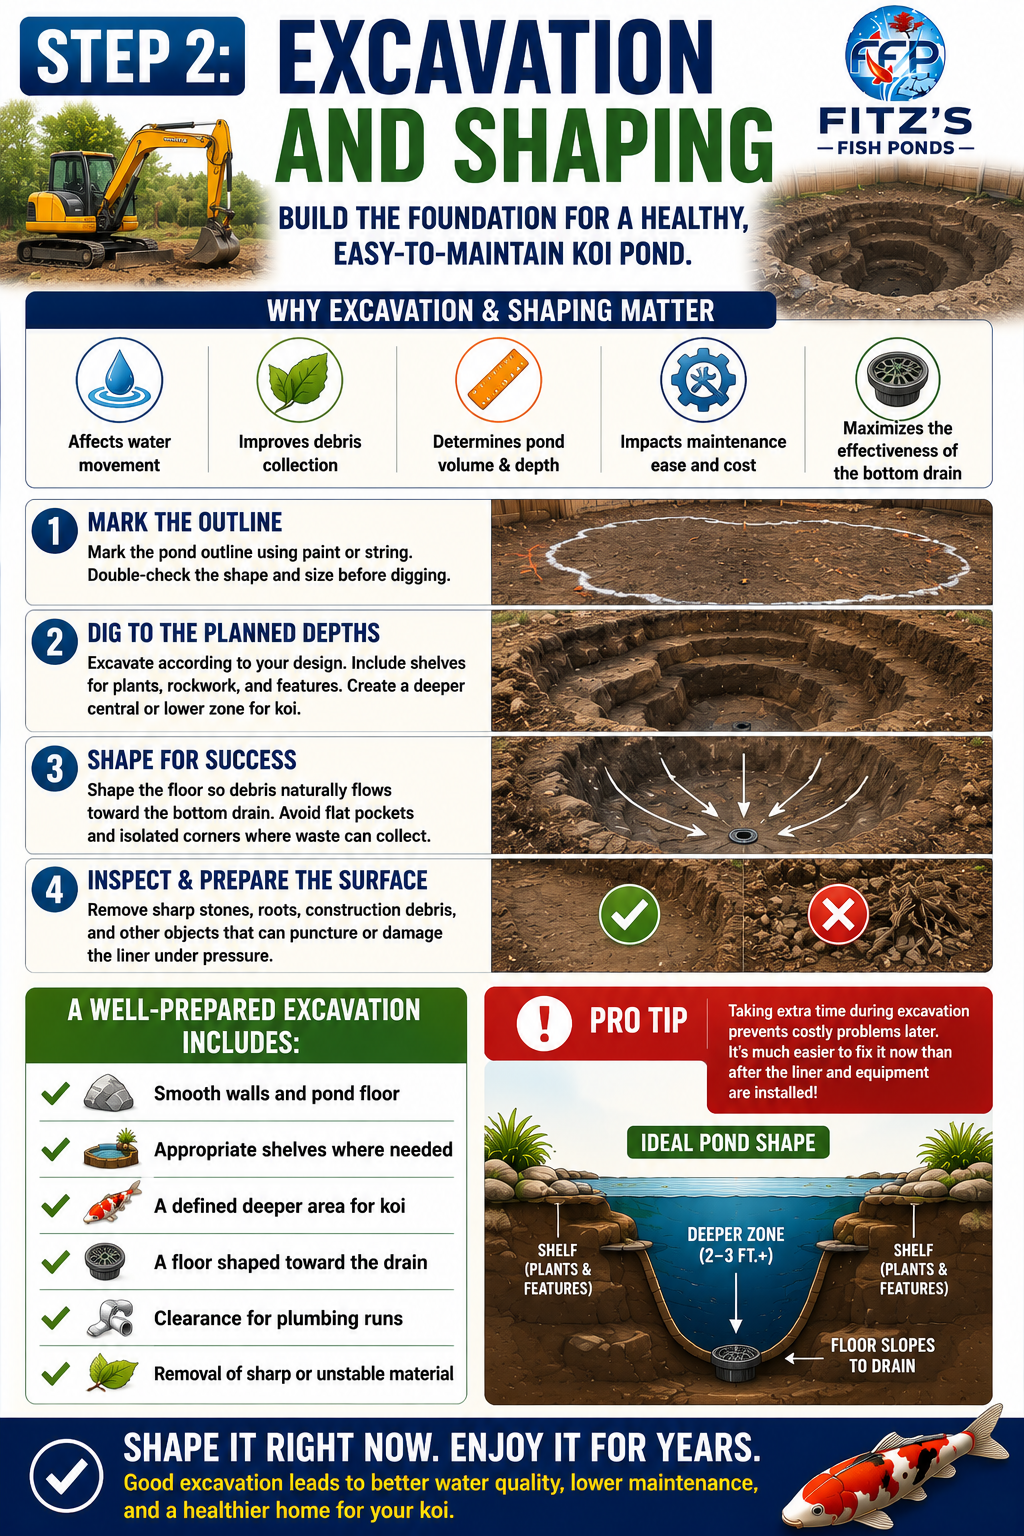
Once the design is finalized, the pond outline can be marked, and excavation can begin. This stage does more than create a hole in the ground. The shape of the excavation influences water movement, debris collection, pond volume, maintenance, and the effectiveness of the bottom drain.
Excavation should follow the planned depths rather than relying on guesswork during digging. Shelves can be included where the design calls for plants, decorative stone, or specific landscaping features, while a deeper central or lower zone provides additional swimming space for koi.
The pond floor is often shaped so that debris naturally moves toward the bottom drain rather than collecting in isolated areas. Flat pockets and poorly circulated corners can become sites where organic material accumulates, potentially creating additional maintenance and water-quality concerns.
Before installing underlayment or a liner, the excavated surface should be inspected carefully. Sharp stones, roots, construction debris, and other objects can damage flexible pond liners when they are under pressure from thousands of gallons of water.
A well-prepared excavation generally includes:
Taking extra time during excavation can prevent problems that become much harder to correct after waterproofing begins.
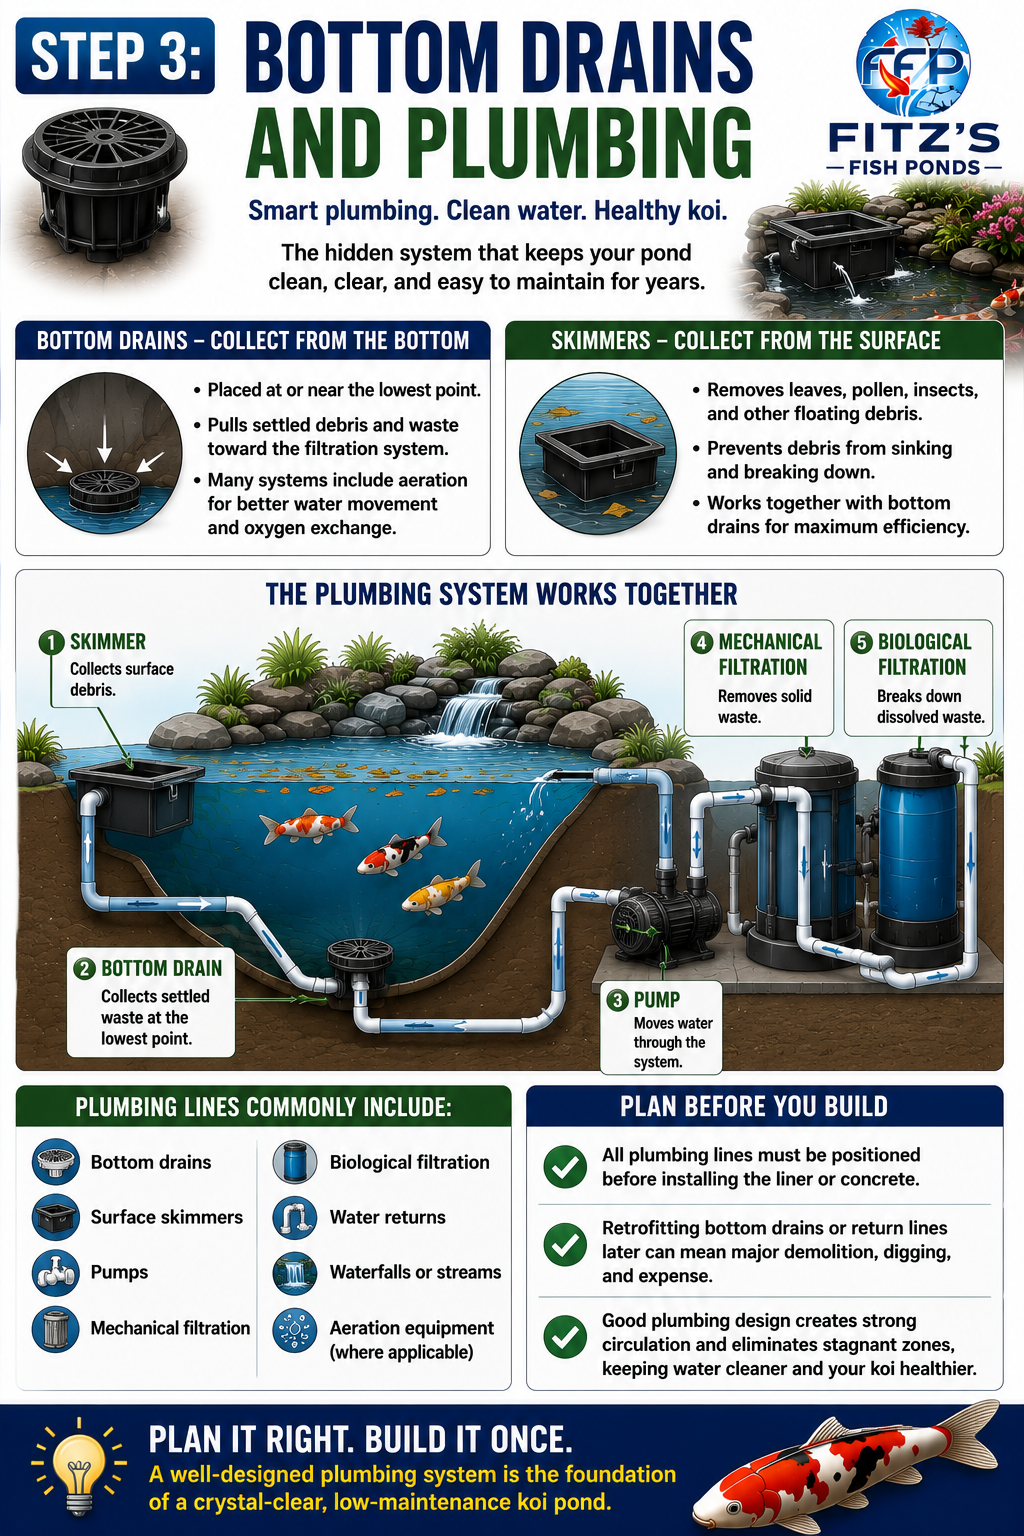
The plumbing beneath and around a koi pond is one of the least visible parts of the project, yet it plays a major role in long-term performance. Bottom drains, skimmers, returns, pumps, and filters work together to keep water moving and remove waste from different areas of the pond.
A bottom drain is typically positioned at or near the lowest section of the pond. Its job is to move settled debris and waste toward the filtration system rather than allowing material to remain on the pond floor. Some designs also incorporate aeration at the bottom drain, which can improve water movement and oxygen exchange.
Skimmers perform a different job. They collect floating leaves, pollen, insects, and other debris before the material sinks and begins to break down. Using both bottom collection and surface collection gives the filtration system access to waste from multiple parts of the pond.
Plumbing commonly includes lines for:
These lines need to be positioned before liner installation or concrete finishing. Retrofitting a bottom drain or buried return line later can require extensive demolition, excavation, and reconstruction.
Good plumbing design also supports effective circulation. Water should be drawn from strategic collection points, filtered, and returned in ways that minimize stagnant zones throughout the pond.
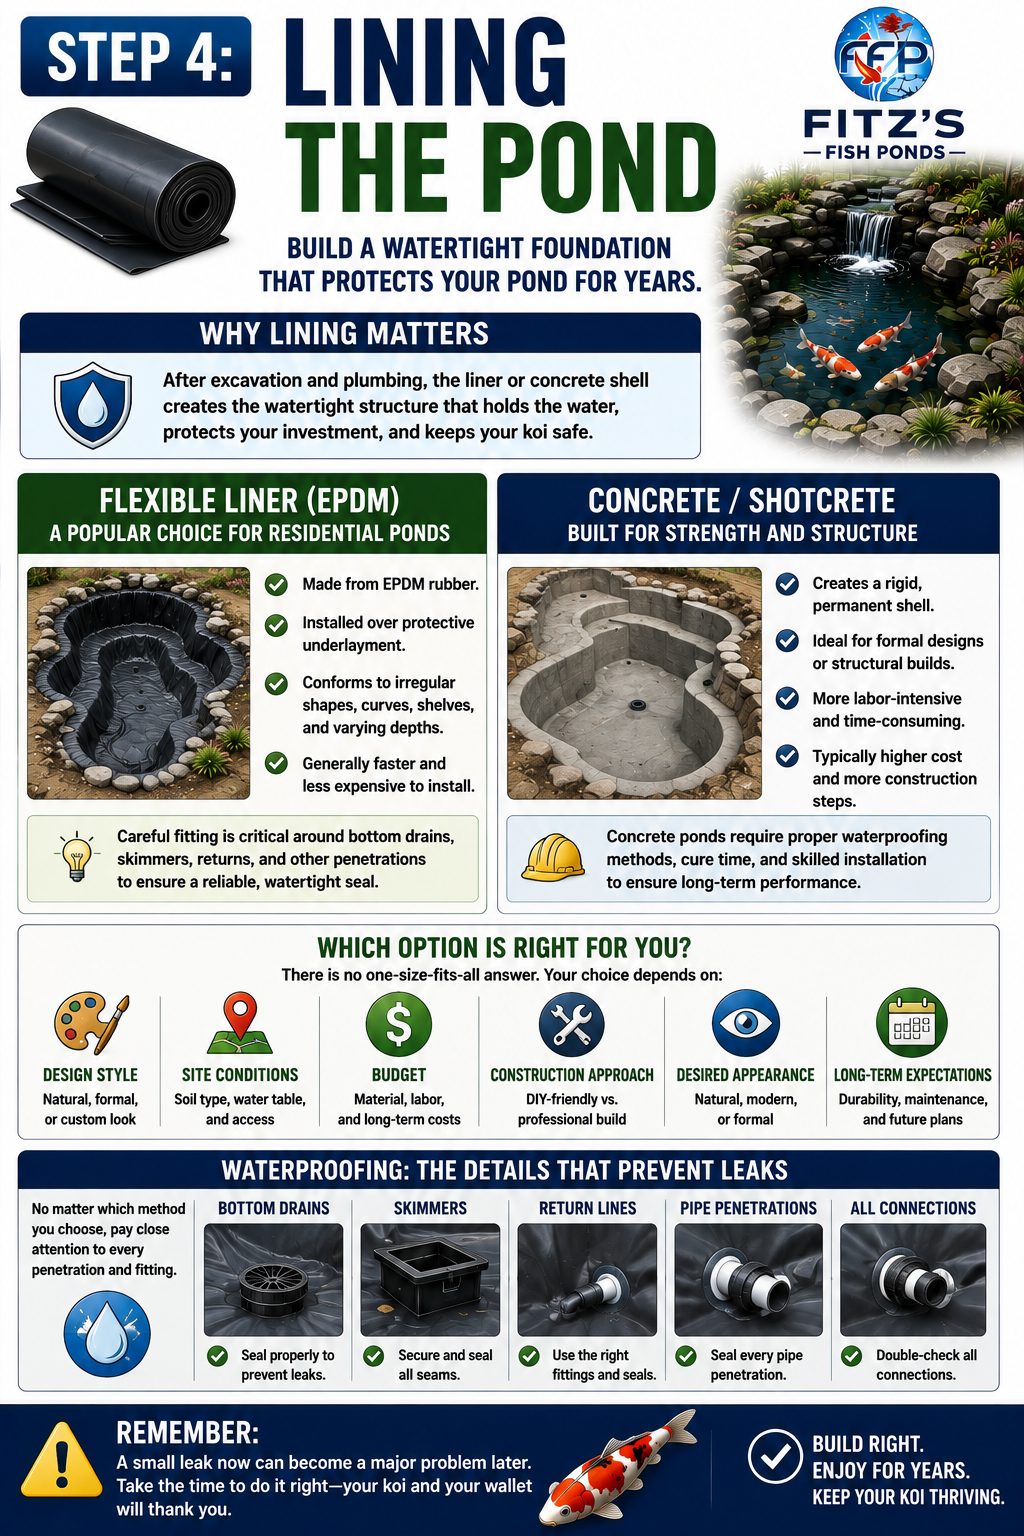
Once excavation and underground plumbing are complete, the pond needs a watertight structure. Two common approaches are flexible liner systems and concrete or shotcrete construction.
Flexible liners, often made from EPDM, are widely used in residential koi ponds. They’re installed over protective underlayment and can conform to irregular shapes, curves, shelves, and varying depths. Careful fitting is important around bottom drains, skimmers, returns, and other penetrations, as these connection points require reliable seals.
Concrete creates a rigid shell and can work well for formal designs or more structural pond builds. The process is generally more involved than installing a flexible liner and can require additional construction steps, waterproofing methods, and expense.
Neither choice should be treated as universally correct for every pond. The decision depends on factors such as design style, site conditions, budget, construction approach, desired appearance, and long-term expectations.
Regardless of the material, waterproofing deserves careful attention. Drain fittings, pipe penetrations, skimmer openings, and return lines must be integrated correctly into the pond shell. A small problem at one of these points can become a significant leak once the pond is filled.
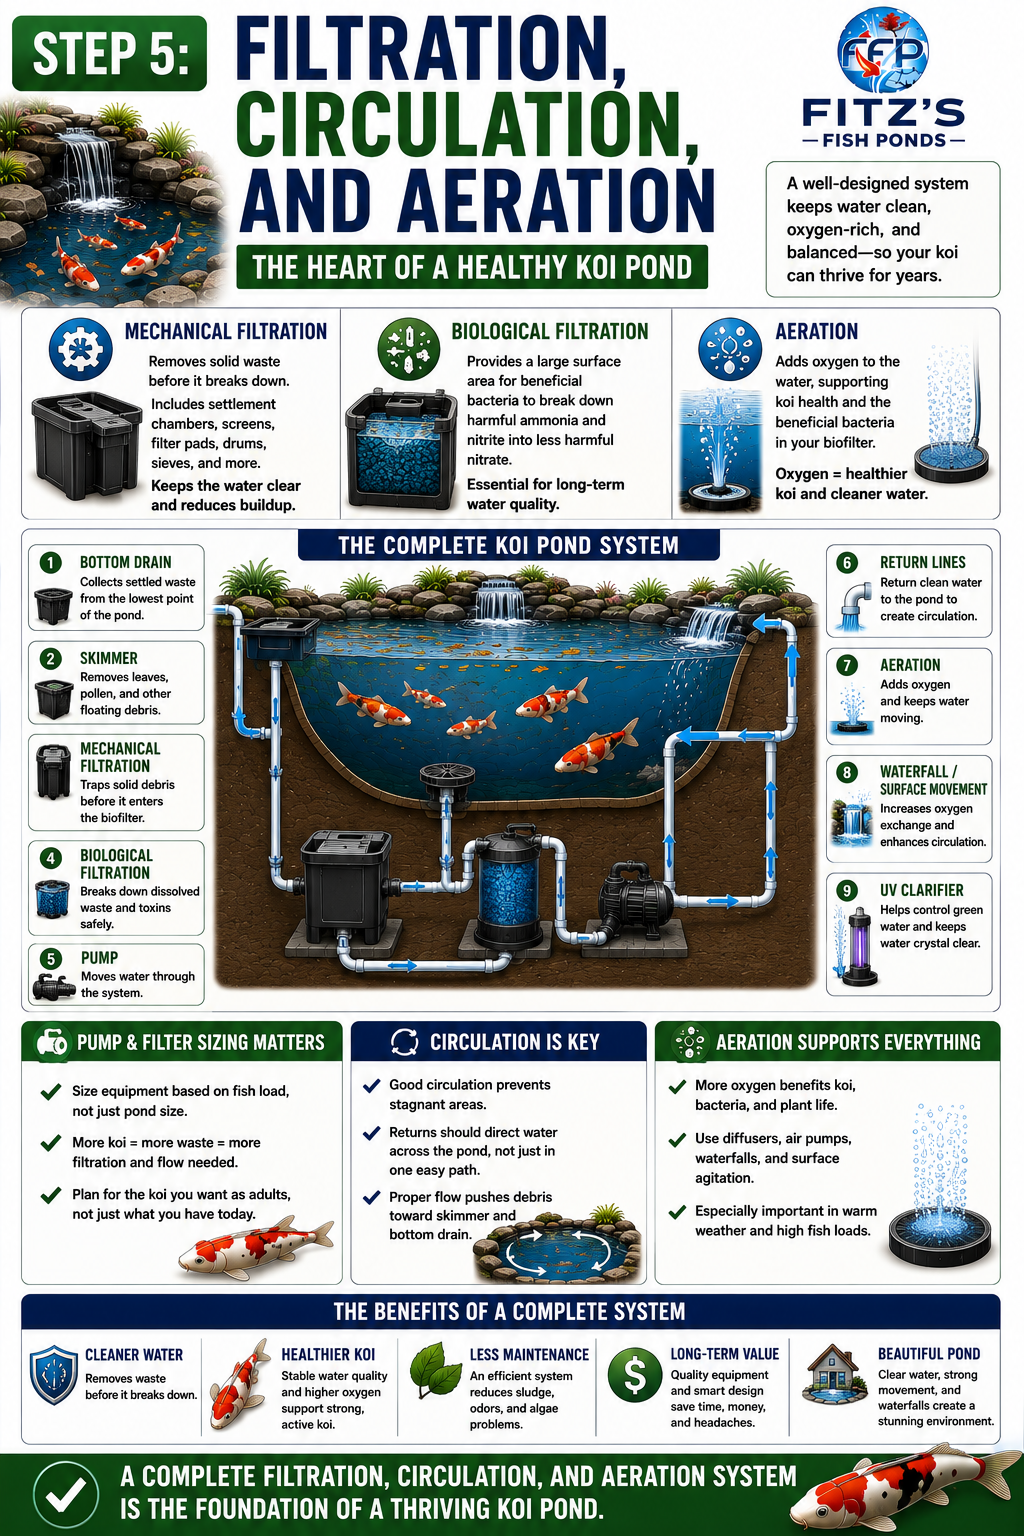
Filtration is one of the biggest distinctions between a dedicated koi pond and a basic decorative water feature. Koi constantly produce waste, so the system needs sufficient mechanical and biological capacity to maintain stable water conditions as the fish grow.
Mechanical filtration removes solid material from the water. Depending on the system, this may include settlement areas, screens, filter pads, drums, sieves, or other equipment designed to capture debris before it remains in the pond or breaks down further.
Biological filtration performs a different function. Biofilter media provides surface area for beneficial bacteria that process compounds created as fish waste breaks down. This biological activity is central to maintaining a pond that can safely support koi.
A complete system may include:
Pump selection and filter sizing should be based on more than the pond’s dimensions. Expected fish load matters because larger and more numerous koi produce more waste. A filter that works comfortably with a lightly stocked pond may struggle if the population increases significantly.
Circulation also needs to reach the entire pond. Water that repeatedly follows a single easy path between the return and the skimmer can leave other sections with limited movement. Thoughtful return placement helps direct debris toward collection points while reducing stagnant areas.
Aeration supports both koi and biological filtration. Air pumps, diffusers, waterfalls, and surface agitation can improve oxygen exchange, which becomes especially important as fish load rises or water temperatures increase.
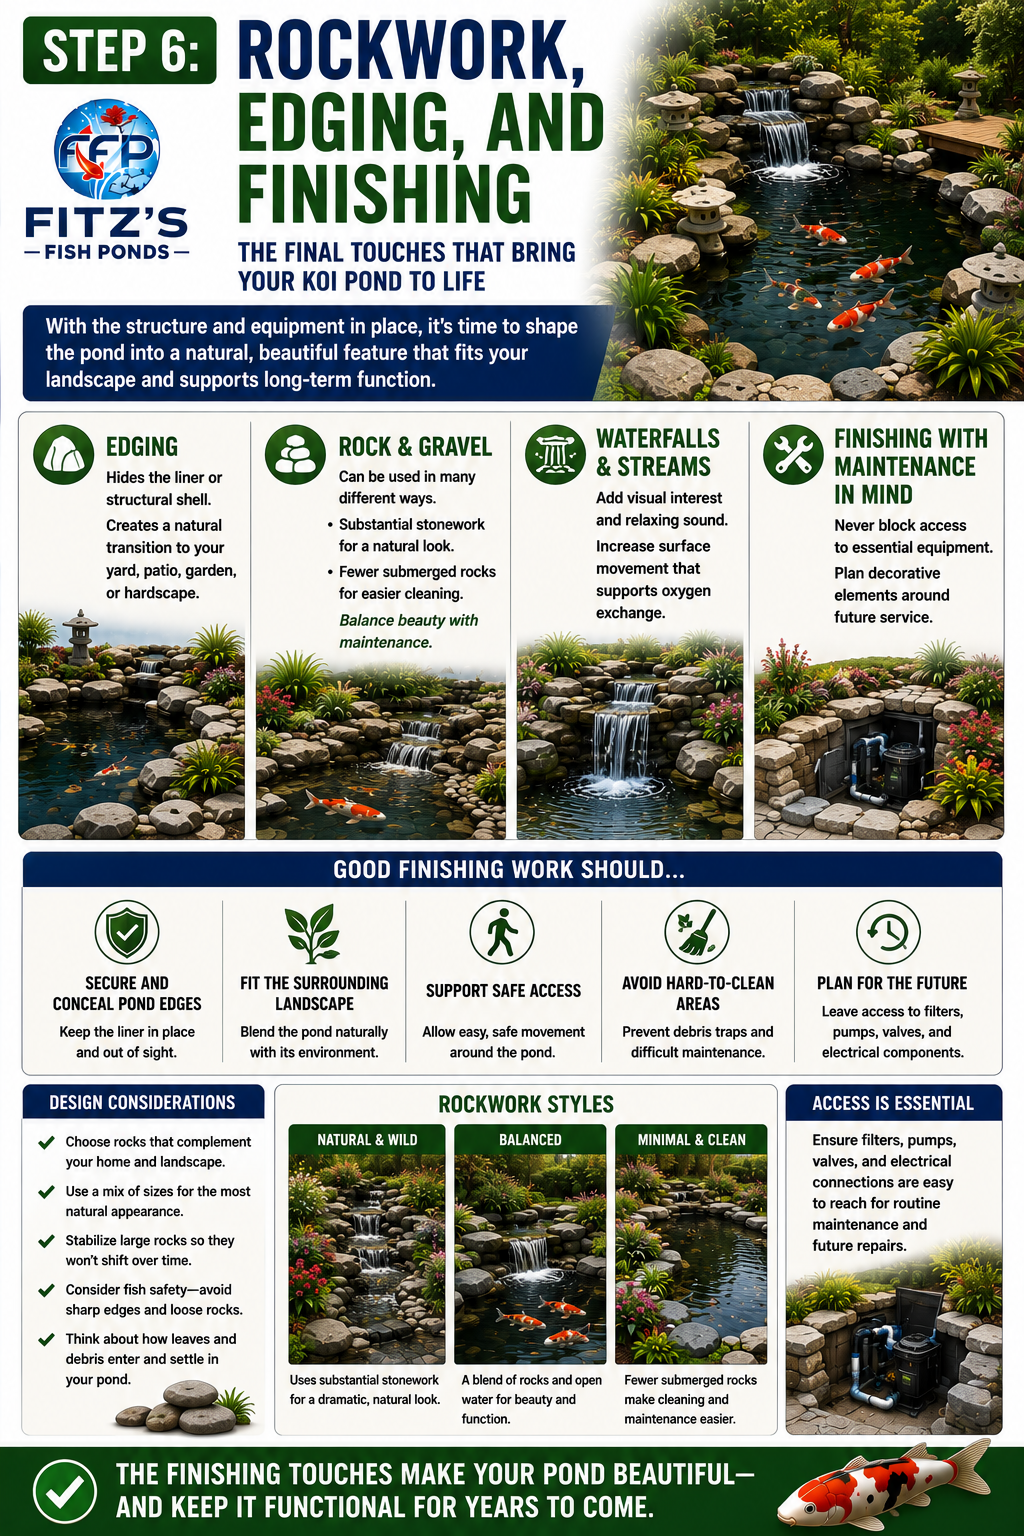
After the structural and mechanical portions of the pond are in place, the project begins to look more like a finished landscape feature. Edging hides the liner or structural shell while creating a natural transition between the pond and surrounding yard, patio, garden, or hardscape.
Rock and gravel can be incorporated in many different ways. Some designs use substantial stonework to achieve a natural appearance, while other koi keepers prefer fewer submerged rocks because smoother pond interiors are easier to clean. Both approaches involve trade-offs between appearance and maintenance.
Waterfalls and streams can also be added during this stage. These features contribute visual interest and sound while adding surface movement that can support oxygen exchange.
Finishing should never block access to essential equipment. Filters, pumps, valves, electrical components, and plumbing connections will eventually require service, so decorative elements should be planned around future maintenance.
Good finishing work should accomplish several goals at once. It should secure and conceal pond edges, fit the surrounding landscape, support safe access, and avoid creating hard-to-clean areas where large amounts of debris can collect.
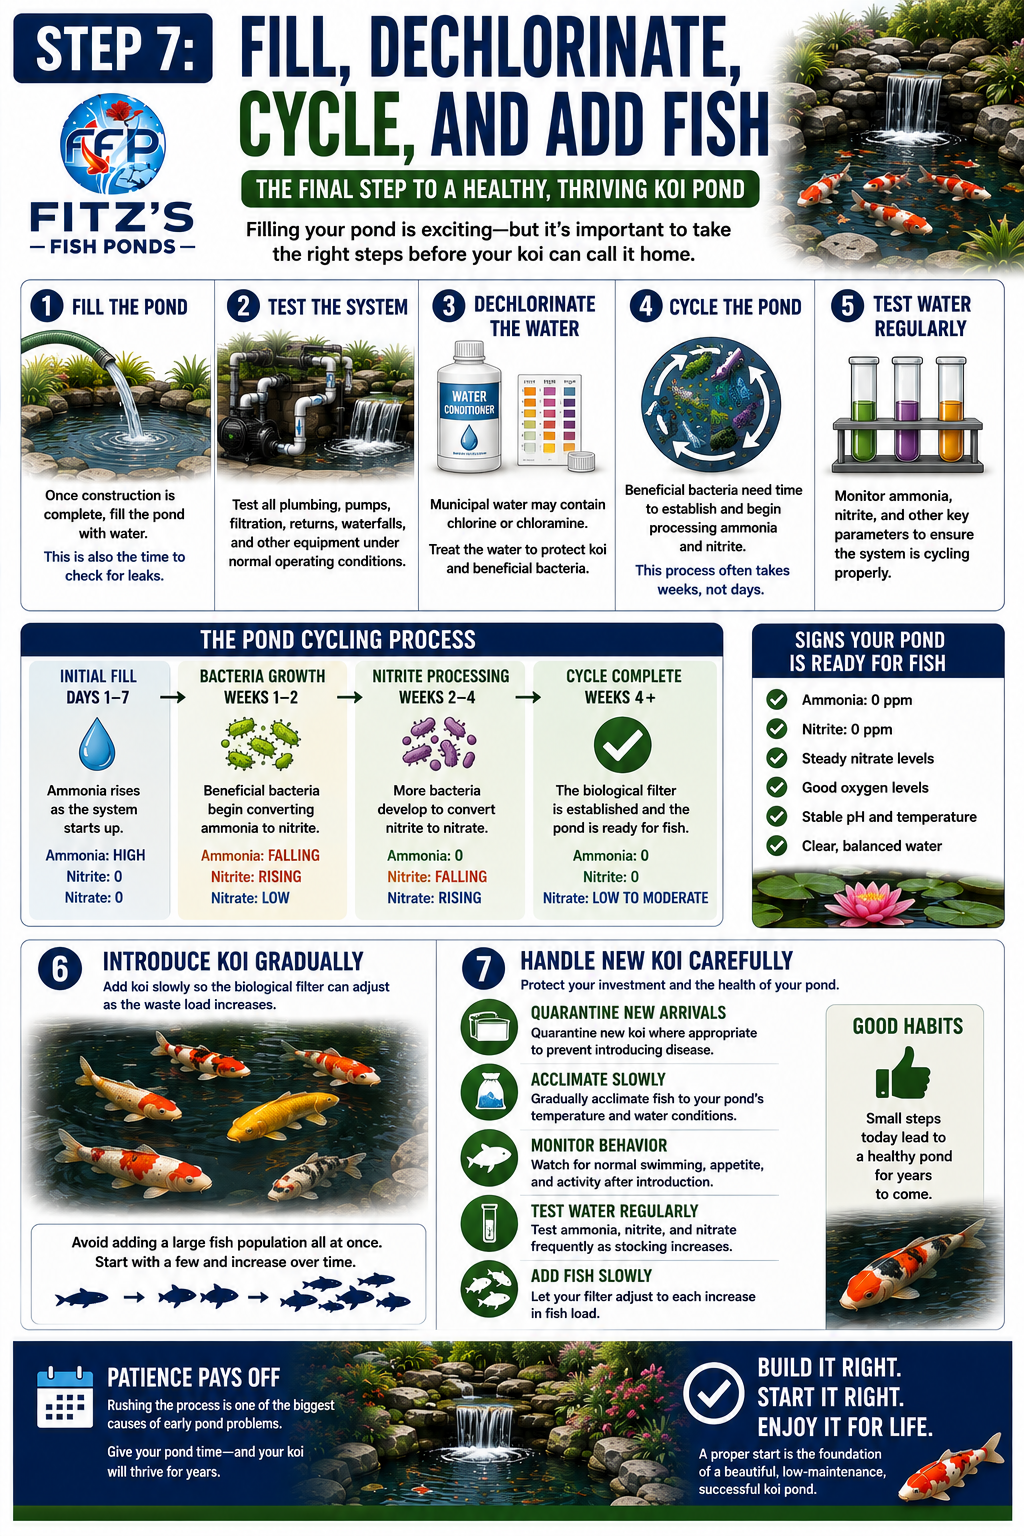
Once construction is complete, the pond can finally be filled, but adding water doesn’t mean the system is immediately ready for koi. The first fill is also an opportunity to test plumbing, pumps, filtration, returns, waterfalls, and other equipment under normal operating conditions.
Municipal water may contain chlorine or chloramine, both of which can harm fish and beneficial bacteria. Water should be treated appropriately before koi are exposed to it, and the filtration and circulation systems should be running as intended.
The next stage is biological cycling. The filter needs time for beneficial bacteria to establish themselves and begin processing ammonia and nitrite effectively. This process often takes weeks rather than days, and the exact timeline can vary based on water conditions, temperature, filtration, and startup methods.
Water testing is essential during this period. Ammonia and nitrite readings help show whether the biological system is developing properly and whether conditions are becoming suitable for fish.
Once the pond is ready, koi should be introduced gradually rather than filling it to its intended capacity immediately. Adding fish slowly allows the biological filtration system to adjust as the waste load increases.
New koi should also be handled carefully:
Patience during startup can prevent many of the water-quality problems that affect new ponds.
The nitrogen cycle is one of the main reasons koi ponds need substantial biological filtration. Fish produce waste, and that waste contributes ammonia to the water. Ammonia can become dangerous to koi if it accumulates faster than the pond’s biological system can process it.
Beneficial bacteria help convert ammonia into nitrite, which is also harmful at elevated levels. Additional bacteria then process nitrite into nitrate, which is generally less harmful and can be managed through the broader pond maintenance routine.
The biofilter exists in large part to provide these bacteria with enough surface area and suitable conditions to establish healthy colonies. That’s why biological filtration can’t be treated as an optional extra in a heavily stocked koi pond.
This process also explains why a brand-new pond isn’t immediately ready for a full population of fish. Newly installed filter media doesn’t yet contain the mature bacterial colonies needed to handle a substantial biological load.
The filtration system needs time to establish itself, which makes cycling an important part of pond startup. Water testing during this period provides a clearer picture of what’s happening than water appearance alone.
A beautiful koi pond should do more than look good. Fitz’s Fish Ponds designs and builds custom ponds around the complete system, including pond size, depth, excavation, filtration, circulation, aeration, rockwork, waterfalls, and the needs of the fish that will live there.
Our construction team works with homeowners from the initial consultation and design through site preparation, installation, ecosystem setup, and the final walkthrough, with experience building everything from above ground ponds, dedicated koi ponds and water gardens to formal ponds, large natural ponds, and custom water features.
If you’re planning a new pond and want the design and equipment working together from the start, talk with Fitz’s Fish Ponds about your project. Talk to an Expert Online or call us at (908) 420-9908.
What Are The Basic Steps To Build A Koi Pond?
The process generally starts with site selection and design, followed by excavation, installation of the bottom drain and plumbing, waterproofing, filtration, circulation, and finishing. The pond is then filled, treated, tested, and allowed to establish biological filtration before koi are gradually introduced. Planning the complete system before excavation usually yields more predictable results than making major decisions during construction.
How Deep Should A Koi Pond Be?
Many koi ponds include a deeper zone around 2 to 3 feet or more, although the appropriate depth varies with climate, pond design, fish size, and local conditions. Colder areas may call for greater depth to help provide more stable winter conditions. Depth also provides more swimming space and can give koi additional protection against some predators.
Does A Koi Pond Really Need A Bottom Drain?
Many dedicated koi ponds use a bottom drain because koi produce substantial waste that eventually settles toward the lowest areas of the pond. The drain helps move that material toward the filtration system instead of allowing it to collect on the floor. Installing a bottom drain during initial construction is far easier than adding one after the pond is complete.
What Filtration Does A Koi Pond Need?
A koi pond typically needs both mechanical and biological filtration sized around the pond volume and expected fish load. Mechanical filtration captures solids, while biological filtration supports bacteria that process ammonia and nitrite. Pumps, circulation, and aeration also work alongside the filters, so the complete system needs to be considered as a whole.
Is A Liner Or Concrete Better For A Koi Pond?
Both approaches can work well depending on the project. Flexible liners such as EPDM are popular for residential ponds because they can adapt to irregular shapes and are generally less involved to install. Concrete creates a rigid structure and may suit certain formal or structural designs, but it usually requires a more complex construction process.
How Long Does It Take To Cycle A New Koi Pond?
Cycling often takes several weeks, although there isn’t one fixed timeline that applies to every pond. Temperature, water chemistry, filtration, and the startup process can all influence how quickly beneficial bacteria become established. Water testing is more useful than counting days because ammonia and nitrite readings show whether the biological system is functioning properly.
Can You Build A Koi Pond Yourself?
Some homeowners build their own koi ponds, particularly smaller or less complicated systems. The project still involves excavation, drainage, plumbing, waterproofing, electrical equipment, filtration, circulation, aeration, and water-quality planning, so errors can become expensive once the pond is finished. Larger or more complex builds often benefit from experienced design and construction support.
What Is The Difference Between A Koi Pond And A Water Garden?
A water garden is often designed primarily around aquatic plants, landscaping, and visual appeal, while a dedicated koi pond places much greater emphasis on supporting large fish. Koi produce more waste and require adequate swimming space, oxygen, biological filtration, and circulation. Those needs affect nearly every major design and construction decision, from depth through final filtration.
| Hours | |
|---|---|
| sunday | 10:00 AM - 4:00 PM |
| monday | Closed |
| tuesday | 10:00 AM - 5:00 PM |
| wednesday | 10:00 AM - 5:00 PM |
| thursday | 10:00 AM - 5:00 PM |
| friday | 10:00 AM - 5:00 PM |
| saturday | 10:00 AM - 5:00 PM |
| Hours | |
|---|---|
| sunday | 10:00 AM - 5:00 PM |
| monday | Closed |
| tuesday | 11:00 AM - 6:00 PM |
| wednesday | 11:00 AM - 6:00 PM |
| thursday | 11:00 AM - 6:00 PM |
| friday | 11:00 AM - 6:00 PM |
| saturday | 10:00 AM - 5:00 PM |
| Hours | |
|---|---|
| sunday | 10:00 AM - 4:00 PM |
| monday | Closed |
| tuesday | 10:00 AM - 5:00 PM |
| wednesday | 10:00 AM - 5:00 PM |
| thursday | 10:00 AM - 5:00 PM |
| friday | 10:00 AM - 5:00 PM |
| saturday | 10:00 AM - 5:00 PM |
| Hours | |
|---|---|
| sunday | 10:00 AM - 5:00 PM |
| monday | Closed |
| tuesday | 11:00 AM - 6:00 PM |
| wednesday | 11:00 AM - 6:00 PM |
| thursday | 11:00 AM - 6:00 PM |
| friday | 11:00 AM - 6:00 PM |
| saturday | 10:00 AM - 5:00 PM |
| Hours | |
|---|---|
| sunday | Closed |
| monday | 10:00 AM - 4:00 PM |
| tuesday | 10:00 AM - 4:00 PM |
| wednesday | 10:00 AM - 4:00 PM |
| thursday | 10:00 AM - 4:00 PM |
| friday | 10:00 AM - 4:00 PM |
| saturday | Closed |
| Hours | |
|---|---|
| sunday | 10:00 AM - 4:00 PM |
| monday | Closed |
| tuesday | 10:00 AM - 5:00 PM |
| wednesday | 10:00 AM - 5:00 PM |
| thursday | 10:00 AM - 5:00 PM |
| friday | 10:00 AM - 5:00 PM |
| saturday | 10:00 AM - 5:00 PM |
| Hours | |
|---|---|
| sunday | Closed |
| monday | Closed |
| tuesday | 10:00 AM - 5:00 PM |
| wednesday | 10:00 AM - 5:00 PM |
| thursday | 10:00 AM - 5:00 PM |
| friday | 10:00 AM - 5:00 PM |
| saturday | 10:00 AM - 5:00 PM |
| Hours | |
|---|---|
| Sunday | Closed |
| Monday | Closed |
| Tuesday | 10:00 AM - 5:00 PM |
| Wednesday | 10:00 AM - 5:00 PM |
| Thursday | 10:00 AM - 5:00 PM |
| Friday | 10:00 AM - 5:00 PM |
| Saturday | 10:00 AM - 5:00 PM |
| Hours | |
|---|---|
| Sunday | 10:00 AM - 4:00 PM |
| Monday | Closed |
| Tuesday | 10:00 AM - 5:00 PM |
| Wednesday | 10:00 AM - 5:00 PM |
| Thursday | 10:00 AM - 5:00 PM |
| Friday | 10:00 AM - 5:00 PM |
| Saturday | 10:00 AM - 5:00 PM |